Trampoline Assembly
The easiest way to assemble a trampoline from Durable Products, is to have at least 2 people working together. Ensure that the ground
level of the trampoline site is as even as possible. If the ground slopes slightly, the long side of the trampoline frame should follow the
slope.
Recommended tools for assembling the trampoline frame – Rubber mallet or a hammer with some timber to fully insert the dowels.
-
Unpack and lay out all frame parts on the ground in a rectangle with the Leg Sections laying on the inside of the End Frames and the Side
Frames positioned between the End Frames.
-
Working in sync, one person rotates and holds a Leg Section so that the open end of the pipe is facing upwards and another person slides
one Side Frame pipe over the Leg Section pipe. Do the same with the other Leg Section and Side Frame, then slide the remaining ends of the
Side Frame over the corresponding Leg Section, resulting in a freestanding frame.
-
Hammer the dowels provided into each End Frame (ensuring they are all they way in) then slide each End Frame into the Side Frame, joining
the section edges together.
The trampoline is now ready to attach the mat and springs. (Instructions 1, 2 and 3 below are for black poly mesh mats – 2-string mats come
with mat wires already inserted. Instructions 4 & 5 are for both black poly mesh and 2-string mats.)
- Unpack and lay the trampoline mat on a flat surface or large table.
-
For right handers, start at the left-hand corner by inserting a Mat Wire into the 2nd hole from the end of the mat (with the kink facing
inwards) and push it back towards the 1st hole, using another Mat Wire as a prop.
-
Continue feeding the first mat wire back into the 1st hole until the kink is in the middle of the 1st hole. Rotate the kink outwards – this
is where the spring attaches. Remove the ‘prop’ Mat Wire and repeat the process by inserting the next Mat Wire into the 3rd hole, working
back to the 2nd hole, and the next into the 4th hole working back to the 3rd hole etc. Manoeuvre the last Mat Wire on each side so that the
kink is exposed. Continue in this way around the four sides of the mat.
-
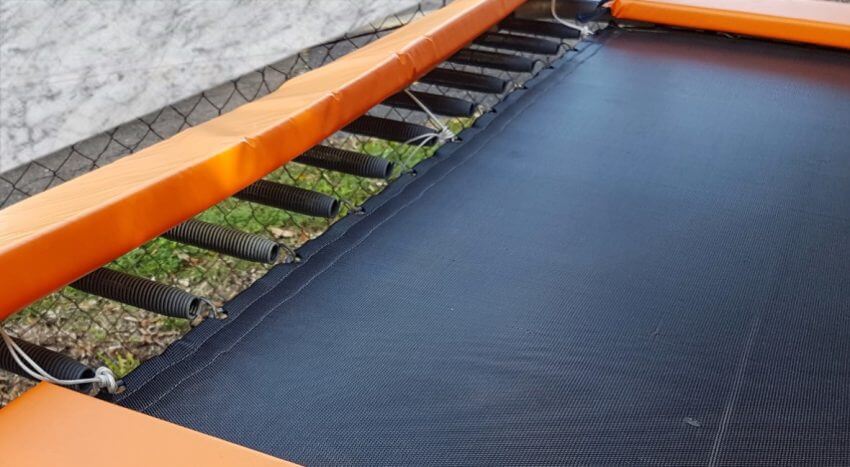
Position the mat on the ground within the trampoline frame, attach the short end of 2 springs on either side of each corner of the mat (8 in
all) then pull and fix the long ends of the springs in the corresponding holes in the frame at the 4 corners.
-
Hang the remaining springs on each Mat Wire and, working in pairs along each side of the frame to ensure an even tension on the mat,
pull and fix each spring to each corresponding hole in the frame. (If working alone, attach 4 springs on one side then swap over to the
other side and attach the corresponding 4 springs etc. travelling in the one direction.) ALWAYS ATTACH THE SPRING TO THE MAT FIRST
AND STRETCH BACK TO THE FRAME.
Once the frame and mat are assembled, the safety pads are the last step.
-
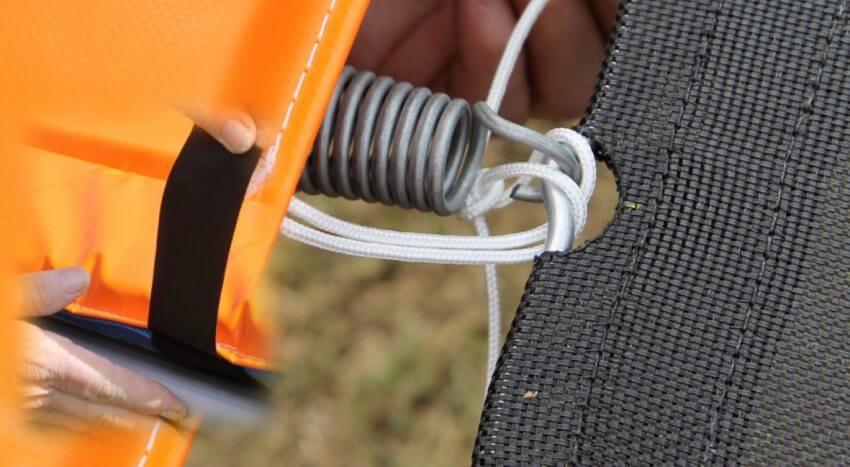
Unpack the safety pads and lay them over the springs along the length and width of the trampoline with the folded (smooth) edge (with the
ties underneath) facing inwards towards the mat and the sewn seam (with the Velcro strapping) facing outwards.
-
Separate each Velcro strip, wrap the soft side (loop) under the trampoline frame pipe from the inside, hold it in place and pull and wrap
the rough side (hook) around the soft side so it attaches firmly.
- Tie the inside ties loosely onto the closest spring to allow enough slack for the stretch of the springs while people are jumping.
Your trampoline is now set up for action!
1. Lay out frame

2. Assemble Frame
3. Insert mat wires
4. Hang springs and attach to frame


